Provenance Creative App Screen:
Create an Entity's Profile
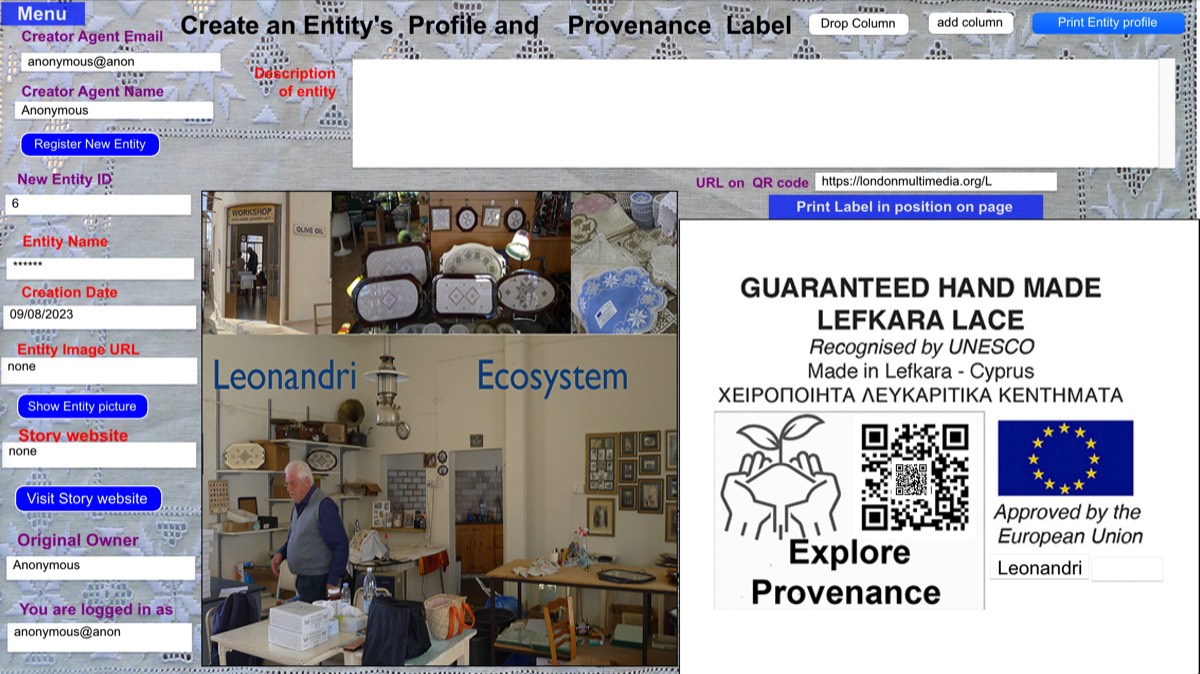
In order to create an entity’s profile, the App user must be currently logged in. Then, when this screen is accessed by the user, he or she finds that he or she is already identified as the Creator Agent for this Entity.
When the user indicates that he or she is ready to start registering this new entity, he or she is invited to fill in all the fields marked in red. The field “New Entity ID” is marked in purple on this screen, which indicates that this field is automatically filled in by the system rather than by the user (Entity identification numbers are assigned by the system in a continuous sequence, so there is no possibility of a duplicate entity number being assigned to a new entity.
In order to identify the picture of the entity to be displayed subsequently to users accessing and reviewing this Entity’s completed profile, the user must now supply the URL for the location in the cloud where an appropriately sized image of the picture of this entity is stored as pure image data.
The user is then shown the “confirm edit” button. When the user clicks on this button, the App performs various verification checks on the information presented in the fields and notifies the user of any errors to be corrected. When user confirms that he or she has made any necessary changes in the information presented, theApp confirms that the Entity’s Profile is complete has been entered in the ProvenanceCreator App’s secure MariaDB database.
The App also creates and displays on-screen the Live Provenance Certification label for the specified entity so that the user can then print the label according to the procedure illustrated below.

Provenance Certification labels can be printed individually at 15 different positions p on an A4 label sheet inserted in a standard inkjet or laser printer attached to the personal computer on which the App resides. This is effected by clicking on the menu button “Print label in position on page” and then choosing the desired position from the popup menu that appears:
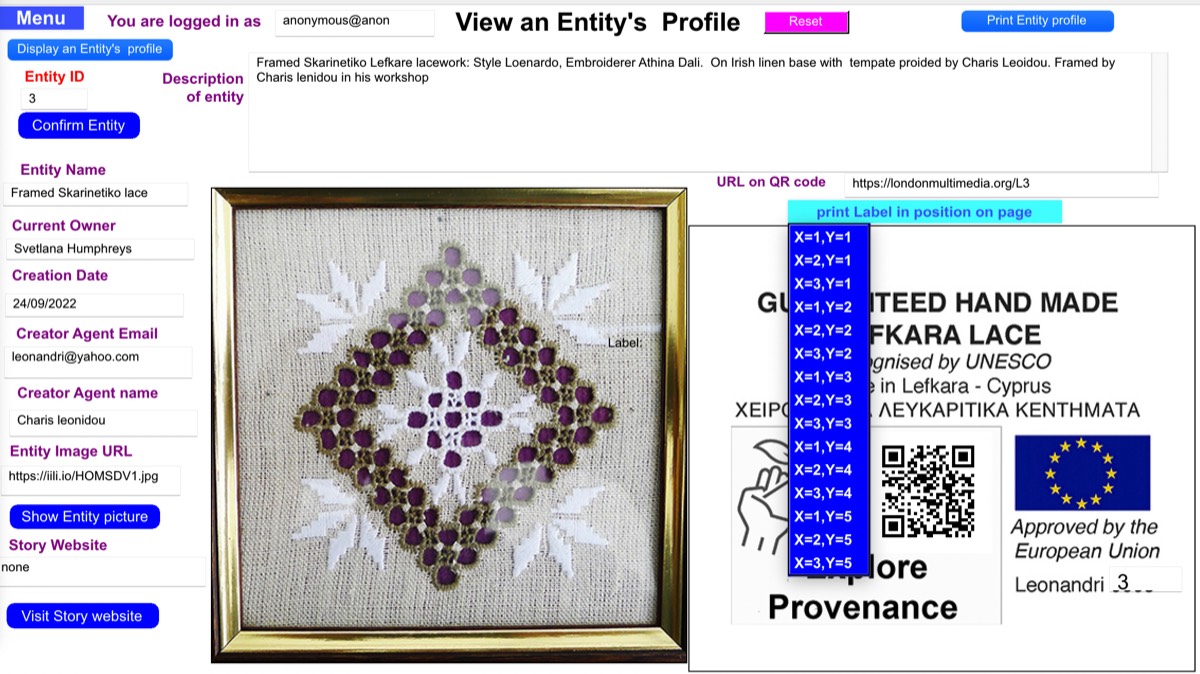
Here, “X=1, Y=1” indicates that the label will be printed in the top left position on the page and “X=3, Y=5” indicates that the label will be printed in the bottom right position on the page.